Technical
Read about technical aspects discovered by our members. Note some articles may appear under more than one category.
Article by Malcolm Denham (Maxi 1100 Misty Blue) on the repair of a Johnson WPS 3.4 fresh water pump
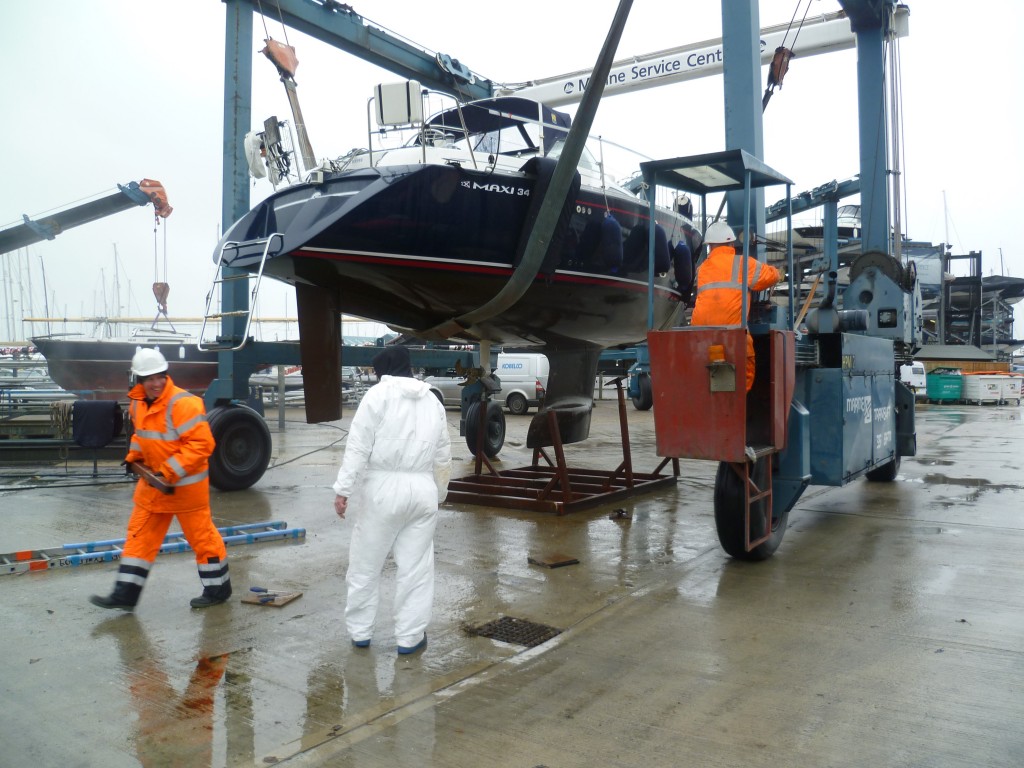
Peter Stonestreet suggested that I write up my experience of removing the keel from my 1997 Maxi 34 a year or two ago as, after the tragedy of Cheeky Raffiki, this is a topical subject. The story starts with us purchasing Ariam from Roger Moon at SD Marine in 2012. She had been chartered for most of her life and we paid an appropriate price, although being a Maxi she was fundamentally sound. After a season I noticed that the bilges were never completely dry and began looking for what must be a small, but persistent leak. On a reach to starboard, the discovery of a thin, pulsing trickle of seawater appearing from a crack in a section of fibreglass fillet at the aft end of the keel, indicated the potential source.
Deep gloom descended as my first reaction was that Ariam must have been grounded hard at some stage in her life, but Neil Desty (of Destys at Hamble Point) kindly came up to Kemps Quay to inspect the hull internally. His view was that this had not the case and the structure was in perfect condition. He was reluctant to remove the keel as “you really, really don’t want to take the keel off a Maxi” but we agreed that the only way to pin down the leak was to drop the keel. Thus Ariam was de-rigged and lifted out at Hamble Point. With all 8 keel bolt nuts undone, you might have expected the keel to come away with little resistance, but not so. After hours in the slings and much heaving and hammering from above, Desty’s troops suggested it would be better for the owner not to watch the next stage of the process. This involved cutting scallops of material out of the fibreglass, front and rear and either side of the keel, and inserting crowbars to lever the keel out of its socket. With an almighty ‘bang’ the keel eventually disconnected and sat upright in the dunnage prepared for it.
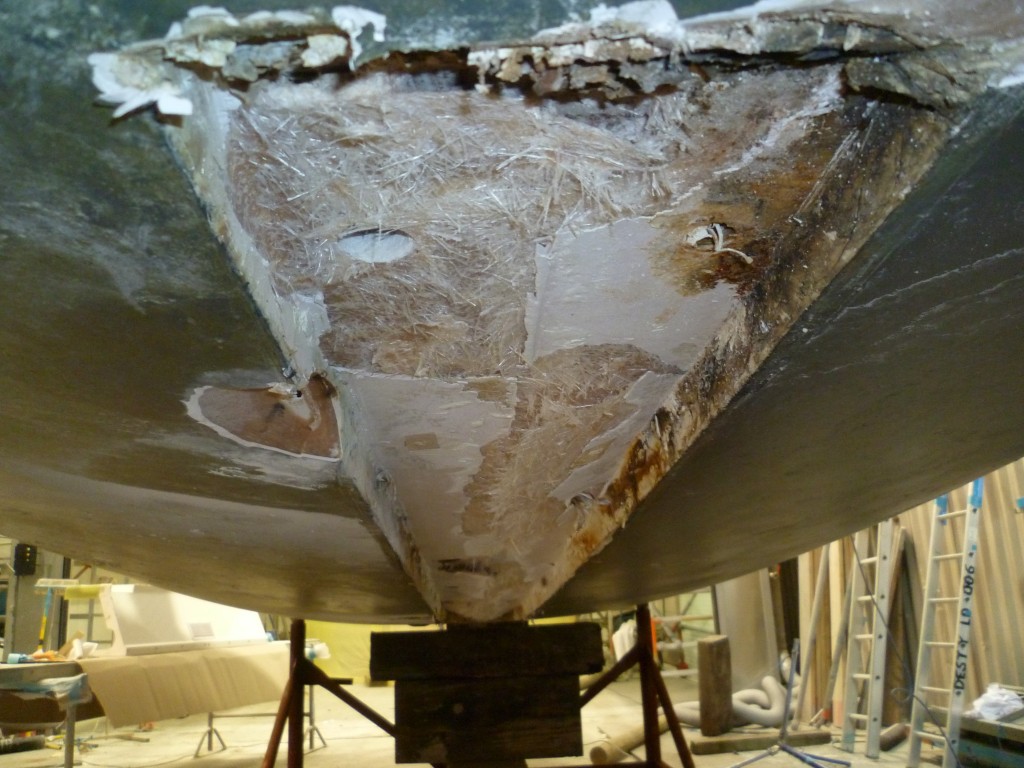
A thin, black line along the sealant indicated where water was entering through a crack at the forward end of the keel, seeping along its length and emerging through a keel bolt hole at the rear, then out through the fillet. I took the opportunity to have some corrosion pits in the keel filled, after slurry blasting the cast iron. Destys then re-coppercoated it, cleaned out the keel slot and refitted the keel with new sealant. Ariam has been bone dry ever since.

The point I took home from this was that the keel attachments in the Maxi 1000/ Maxi 34 hull are immensely well engineered. First of all the keel fits into a 2″ deep slot in the hull, ensuring there is plenty of solid fibreglass structure around it. Secondly the bending moment the keel imposes on the hull, as the boat heels, is reacted over a wide area due to the flat, flared-out top section of the keel. This makes the keel more expensive to cast, but has the added benefit of allowing the 8 keel bolts to be staggered athwartships, further spreading the load. I am very happy to see how well the boat is constructed and have no worries about the keel detaching at sea.
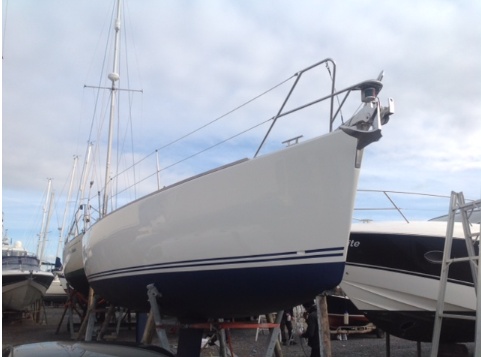
Having looked at new boats at the shows and disliked their light build and IKEA style interiors we decided to renovate our 14 year old Maxi 1100’s faded and much polished (and therefore eroded) dark blue gelcoat with new gelcoat in cream. Having first considered repainting or vinyl covering her top sides we decided to leave her in the most capable hands of Chris Murch of Northney Yacht Services and treat her to a totally new look!
I have had lots of inquiries regarding cost but it’s difficult to quantify. There is the haul out, mast and rigging removal, polythene watertight tent, removal of all hardware and vinyl stripes etc. I had all anti foul removed and re epoxied below waterline so that the new gelcoat could be faired in. The deck had to be cleaned and polished afterwards along with all fittings. There was approximately 100kg of gelcoat applied which after all the sanding in between coats became about 50kg but that was of course after most of the blue was removed. Then three coats of anti-foul on top of several coats of epoxy. All in we are talking about 9-10k sterling for an 1100. We are extremely pleased with the results- she is like a brand new yacht! I can most thoroughly recommend Chris and his firm for an excellent job.
David Hodges
 I keep Lookin Foor Kloos on the Lymington river and for some years have been using Trilux antifoul on the propeller. While this has represented an improvement in fouling vs just polishing the prop, I was still noticing a significant slow down in performance under motor come the end of the season and some growth of worm when the boat was lifted.
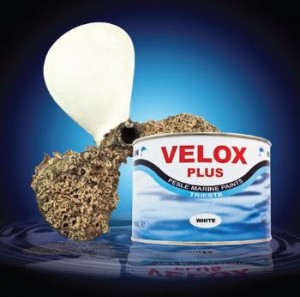
Last season, I was getting the boat ready on the yard and a neighbour was praising the virtues of Velox Plus, an Italian antifoul paint and gave me the remains of his tins of primer and antifoul which I gratefully received and used.
So, how did it perform? I must say that the results have been very positive. I re-launched Lookin Foor Kloos in late March and lifted her on August 20th for a scrub prior to a cross channel race. While the hull was a little slimed which washed off easily, the prop came out brilliant white with no fouling at all. The yard commented that most of the boats lifted had had quite some fouling on the propeller so they were surprised.
Re-launched, the prop. Still appears to have remained clean of foul – I will see what it looks like when lifted again in May.
Details of Velox Plus can be found here at www.marlinpaint.com and is available from Marinescene for £36 for the antifoul and primer.

Volvo MD2030 Exhaust Riser/Elbow
Does your engine suffer from lack of power, unable to obtain maximum revs?
We bought a “pre owned” Maxi 1100 – “Maxi Magic” from SD Marine. Whilst she is a very quick boat under sail, the same could not be said when she was motoring. Having sailed through most of the boats out in
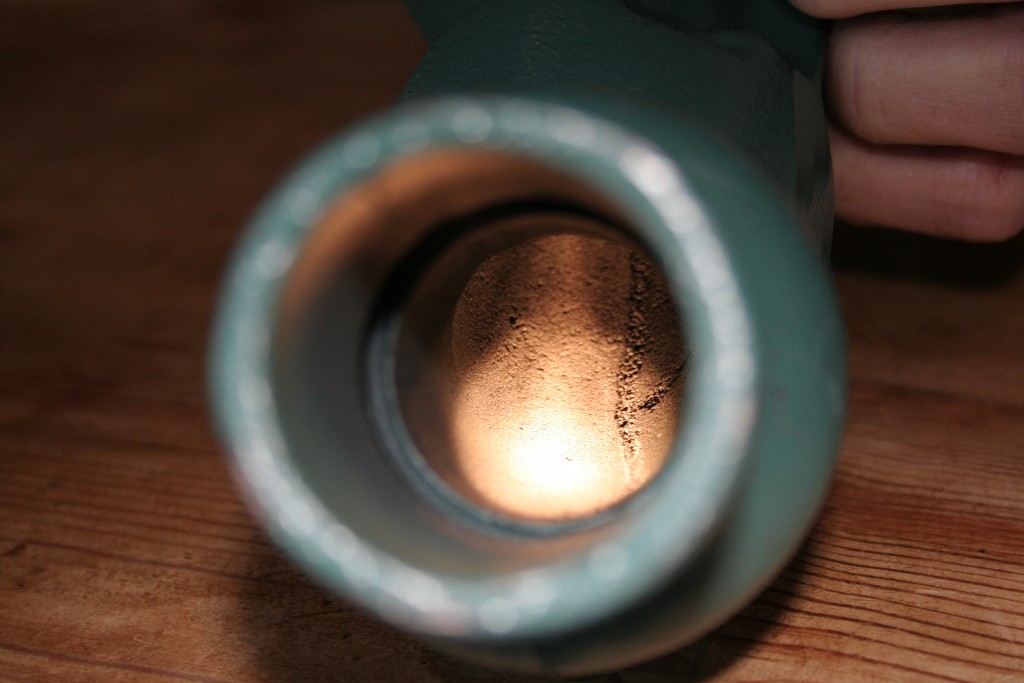
We had noticed that we could only get a maximum of 2800 RPM out of the engine under load, where as on our previous boat, a Maxi 34 “Eye of Horus” we could get 3400 RPM. The difference in RPM was initially put down to only having a two bladed fixed prop on the 34 as opposed to the three bladed folding on the 1100 and an extra two tons weight difference. Based on our engine experience with the Maxi 34, I took the opportunity in the autumn to remove/inspect the exhaust riser. Having removed the riser it was no surprise to find that approximately 1/3rd of the inner sleeve (where the raw water mixes with the exhaust gas) had corroded away and the main bore had been reduced from 35mm diameter to 7mm diameter (see photo – just enough to get a pencil through!) by the build up of carbon and salt.


Inlet-Old unit with pencil sized opening New unit with 35mm bore
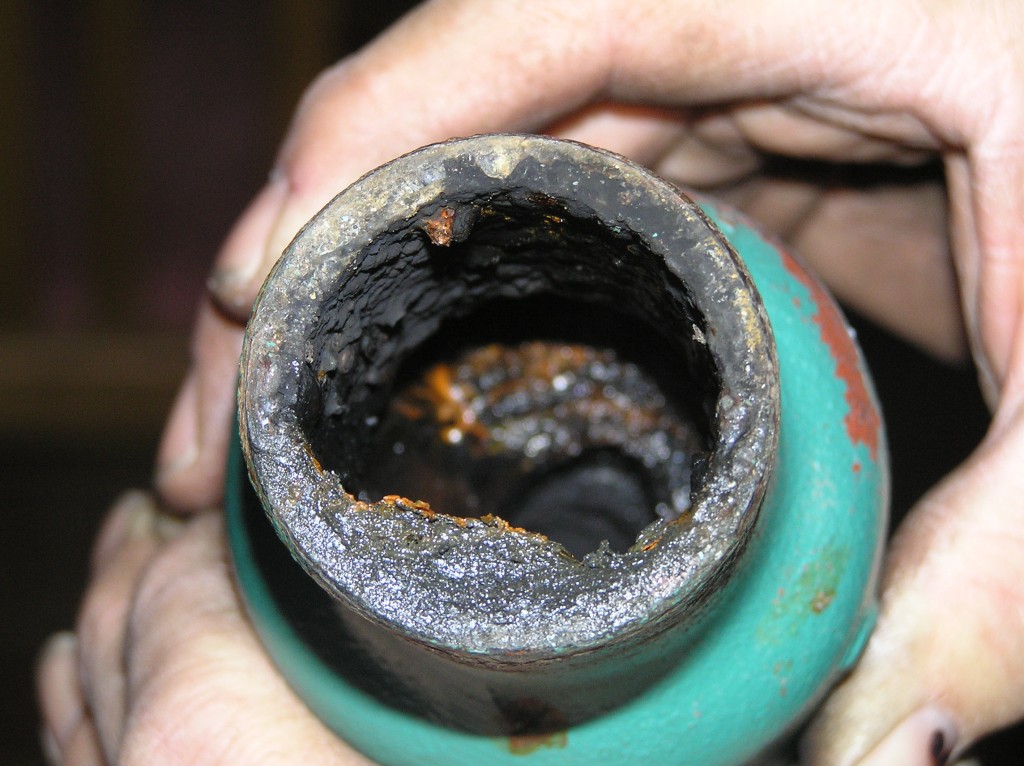
Outlet-Old unit with corroded water gallery New unit
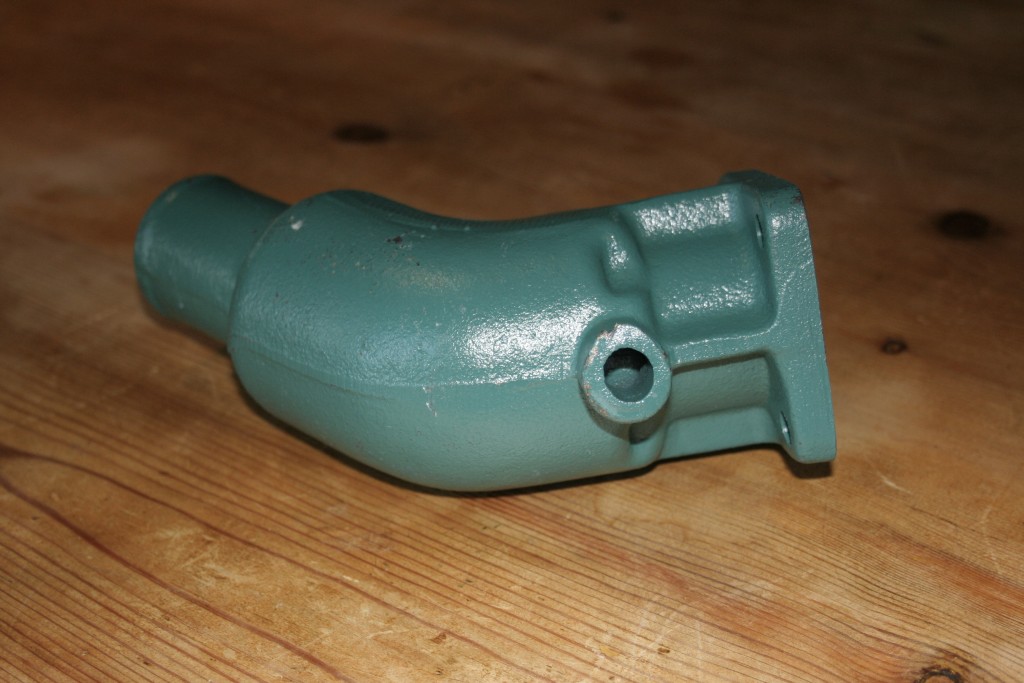
In my opinion there is no point in trying to salvage a riser in this state so it was off to the local Volvo agents for a new one (£160 plus £4 for the gasket). (Looking around the internet I did not find any at a materially better price). If you do try and clean/salvage an exhaust riser be very careful of the inner sleeve/water gallery, as although it may be intact, it will probably be rotten and will break up if any force is applied to it.
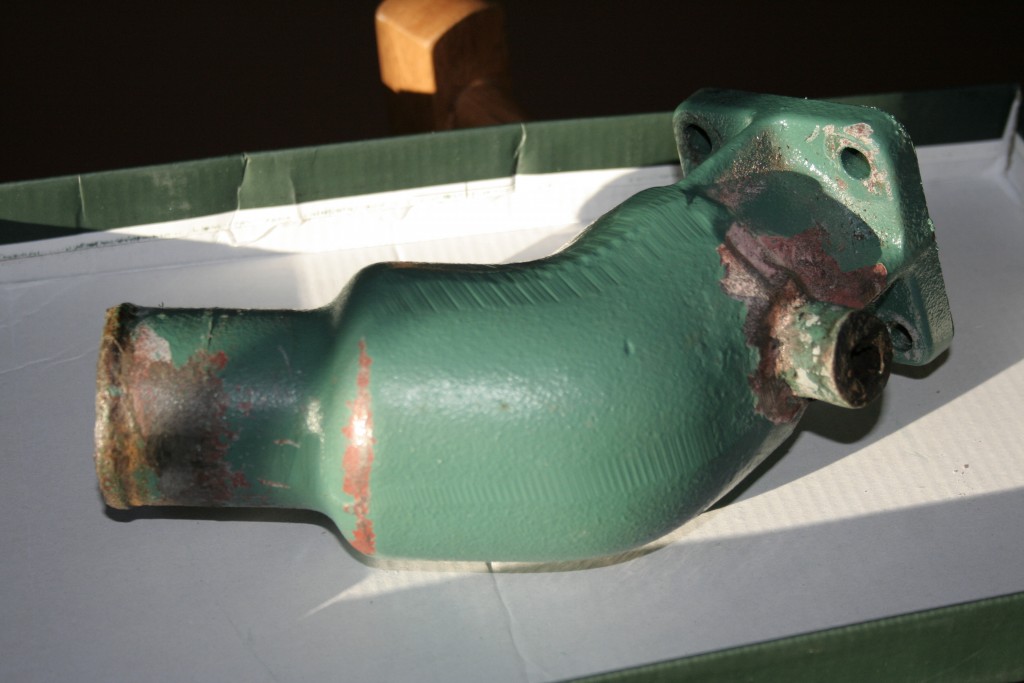
Outside View Old unit does not look so bad from the outside!
Having fitted the new exhaust riser we took her out for a sea trial and at full throttle got 3350 RPM. That should be enough to see off the other boats motoring back into
On a more serious note, I would recommend that you check the exhaust riser after say 600/700 engine hours (Maxi Magic had done 1100 hours). I considered getting a stainless steel riser fabricated, however, apart from the estimated cost (£250), talking to other people about their experiences with stainless risers, the sulphur in the exhaust corrodes the stainless and stainless cannot absorb the thermal shock (cold sea water and hot exhaust gas) as well as cast iron. Also when stainless cracks you will get a hole whereas cast iron will tend to weep.
Removing the exhaust hose from the riser is a bit of a chore. I used a blunt screw driver and gradually worked it into the joint, taking care not to tear the rubber pipe, and it took about 30 minutes to release. To make it easier to remove the hose in the future, I wrapped the outlet of the new riser in PTFE tape.
Having checked our fuel consumption, this has improved, and the tiny bit of hunting that we had at tick over has now gone. A job well worth doing.
Rob Ware – Maxi Magic